Mae govannen, mellon nín!
Another post about how to paint a miniature dwarf from Thorin's Company, and this time it's Kíli!
Despite the absence of a beard, this miniature provided me a very joyful painting session, on which I particularly enjoyed playing with the different shades of blue and grey.
 |
Assembled and unprimed miniature of Kíli.
|
Who is Kíli?
"
Dwarf of Thorin and Company.
Kíli embarked on the Quest of Lonely Mountain in 3019 of the Third Age, which resulted in the death of Smaug the Dragon and the re-establishment of the Dwarf-kingdom under the Mountain.
As the son of Thorin's sister, Dís, Kíli was fiercely loyal to his uncle. Both Kíli and his brother Fíli were killed in the Battle of Five Armies while defending Thorin."
Source of description: David Day, Tolkien, the Illustrated Encyclopaedia.
Tutorial
 |
| The skin painting method I followed is the exact same presented with Glóin (you can check it here). |
 |
V. In here I basecoated the entire leather and hair with a dark brown.
VI. This step was focused on highlighting the hair and painting the beard hairs. For the beard all I did was diluting the paint with medium, soaking most of the paint on a paper towel and then designing the beard the way I wanted.
Also, I did some experiments with the wet blending technique which can be visible on the quiver and the sword grip.
VII. For the basecoat of the cloth/hood I mixed green and blue until I was satisfied with the colour obtained. Depending on the paints used, you might wish to use a bit of white as well.
VIII. A basic shading/washing step, focused on all the previously painted cloth. |
 |
IX. The highlights of the hood were managed by gradually applying white to the green/blue mix, in order to make the most prominent parts stand out.
X. I wanted to achieve a different tonality of grey (brownish), so I decided to basecoat the cloak with a dim brown, which worked perfectly for my wishes.
XI. Since my aim was to get a dark grey cloak, the shades had to be done in black, instead of brown.
|
 |
XII. For the highlights of the cloak I used another mix. This time the grey was applied gradually to the previous brown, for about three different highlighting steps, each one lighter than the last.
XIII. For the pants and boots to stand out from the cloak I went for a "pure" grey process, starting with the dark basecoat.
XIV. The highlights were done with a very light grey, both on the pants and boots.
XV. The glazes had to be different in order to make discernible the boots and pants, so I naturally went for a brown glaze for the boots and a black glaze for the pants.
|
 |
XVI. In this step, all the metallic parts were painted with a dark silver (including the tips of the bow).
XVII. Just for the sword, the shades were given with black and the weathering with a diluted brown.
XVIII. The highlights of all the metallic part were achieved with a lighter silver, naturally.
XIX. And finally, I used a desaturated gold to paint the tips of the bow (one of the best decisions I took for this miniature).
|
Showcase
 |
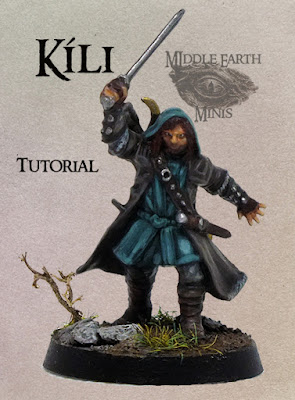
| After basing and varnishing, here's Kíli, ready to join his brother and defend their uncle Thorin! |
And that's all for now my friends!
The next tutorial will be about Bifur, which is already finished!
I really hope you find this tutorial useful!
Until next time! Keep on Painting and Wargaming!
Namárië!


Excellent work mate!
ReplyDeleteThank you my friend :)
Deleteanother great tutorial! Miniature came out looking great!
ReplyDeletethough it does make me realize how many steps I skip when I paint my own miniatures. LOL
Thank you Stewart!
DeleteWell, we all have our own way of painting. I believe the richness associated with skill sharing (in blogs, youtube, facebook groups etc.) makes us get better with time :)
Great painting! I like the base also, very realistic!
ReplyDeleteThanks George!
DeleteThe secret lies on the lichen :D
Cheers