81st post - Making Small Walls and Fences!
Hello guys.
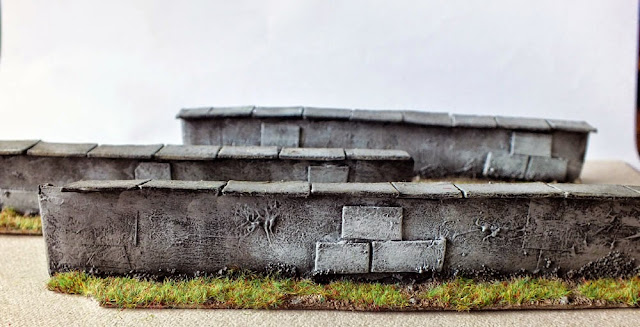
Well, this time I've decided to make a guide about walls and fences that you can use to make a long defensive barrier.
I have built 3 normal walls, 1 destructed (partly) wall and 1 fence.
For all of them I've used the following materials:
- Pva glue;
- Fine cardboard;
- Thick cardboard;
- Black gesso or plaster;
- Protection tape;
- Balsa wood;
- Sand.
So, let us start...
First thing I did was the walls themselves.
With 15x2 Cm stripes, I managed to get enough height to let a 28mm miniature use it as they please.
Three stripes on the thick cardboard should be enough to make 1 wall. All I did then was glue them all together.
Now it's time to make the bases.
For this I have used a fine but really strong cardboard I had around.
Now, with the measures of 15x3 Cm, the bases will have one special yet essential point: the corners of the bases must be cut of in order to make the joints able to be together, like the pictures bellow.
After gluing the wall to the base, we arrive at the point were all the fun begins :)
With a few fine cardboard stripes I added some details on the wall and on the top of it.
After that, is time for the plaster, which will provide some texture and some extra strenght to the piece.
Then takes place the sand in the base and the painting work.
*********************************************************************************
Their bases are exactly the same, and the fence is made of balsa wood, and glued with pva.
Here are the rest of the photos:
***************************************************************************
As a final result, I decided to take some extra photos of them all together to show how well they stick and provide a good defensive barrier.
Hope you guys like it :)
Happy hobbying


Outstanding! It looks so beautiful and so simple...I've tried something similar...but my result was much worse...congrats!
ReplyDeleteThank you Phil :)
DeleteI find this the best and easiest method. Pretty simple and effective.
Que buenas piezas has hecho con materiales tan sencillos. Me gusta el paso a paso y el resultado muy real. Un saludo
ReplyDeleteMuchas gracias Pilar.
DeleteMe alegro que te guste este mi trabajo.
Un saludo.
Que buenas piezas has hecho con materiales tan sencillos. Me gusta el paso a paso y el resultado muy real. Un saludo
ReplyDeleteFantastic friend! You inspired me to make something like this:)
ReplyDeleteI'm glad :)
DeleteIt's so easy, I did it in one afternoon :)
Thats a Lovely wall and fench sir.
ReplyDeleteMany thanks Andre :D
DeleteHola
ReplyDeleteMAGNIFICO trabajo si señor
Y muy buen el pap,es útil
un saludo
Muchas gracias Jose :)
Delete